Thursday, May 20, 2010

Metering Off the Blackflies

It was time for another trip to the Jackson farm for the guys. It is a weekend of fishing, 4-wheeling, relaxing, campfire, and generally just a good time. It is also a good chance for me to take some photos. This year the weather was a little gray. It was tough to wake up early in the morning for good light, especially when the good light wasn't very good. The result was that I was disappointed with my photos - I just wasn't 'feeling it'. I lacked motivation and was getting a little frustrated. Especially since I had been looking forward to the trip for months as a photo opportunity, after all it is a beautiful place, remote, lots of wildlife, lush fields, thick forest, lots of water - just beautiful.

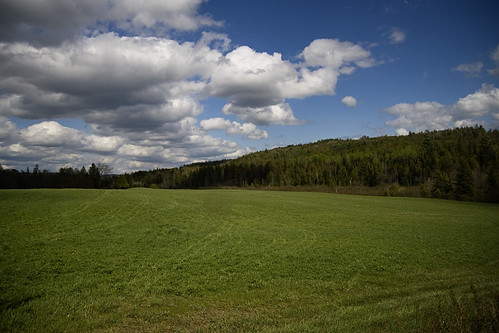
How could I possibly be short of photos? Sure, the light wasn't great, but I should have found something worthy of a photo. But, everything I looked at looked like photos from last year - so why shoot. I was more than a little frustrating - until the last day... I was snapping photos of the same old field - just a field.

IMG_8844 copy

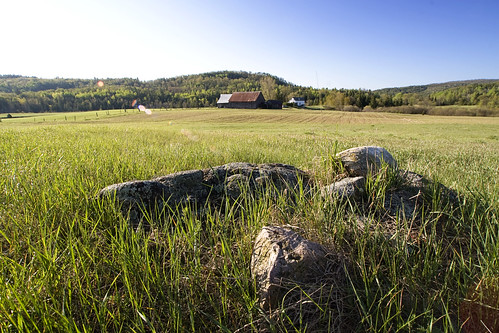
But. Then I dropped to my knees to swap lenses and saw this.

IMG_9036 copy

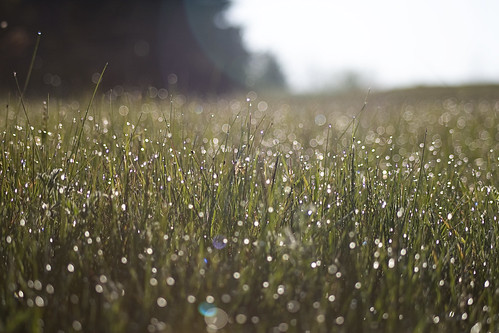
It was there the whole time - I just needed to change perspective. The same field - instead of looking at it from the perspective of a 5'9" adult - I switched to the perspective of the blackflies that infested every inch of this landscape. It is a lesson often told to photographers - don't be afraid to get dirty, see things from a different perspective, get down on the ground. Really down on the ground - like lying in the wet dewy grass down on the ground.

IMG_9055 copy

IMG_9053 copy

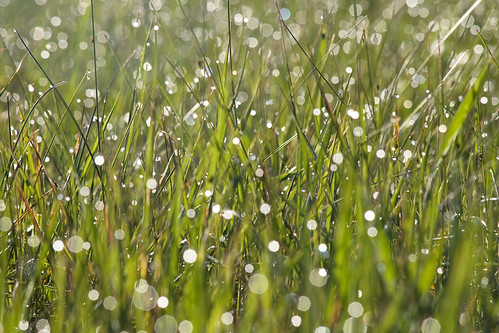
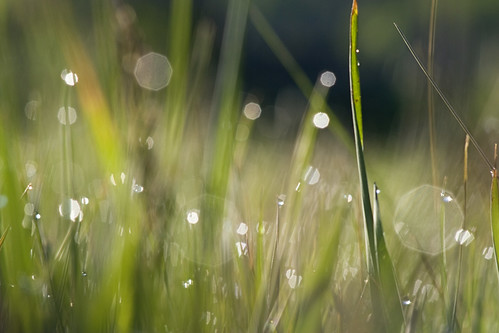
Well, it really works. If you are looking at the same thing and it is getting boring. Look at it differently. The different perspective will be refreshing and new.

Just keep in mind. When the blackflies are swarming - I mean really swarming - the camera just might meter off the blackflies and throw off your exposure. And, even if you get your exposure right you are probably going to end up with lots of nasty bites, and while your face down in the grass - your butt is really exposed... Lots of nasty bites.

Don't get bored... Shoot away... You will find plenty of time later to get bored sitting at home scratching your butt.

IMG_9080 copy

IMG_8962 copy

Thursday, February 4, 2010

Editing for Print

I know it has been ages since I posted here. Just too busy.

Last spring I took a bunch of photos on a guys weekend trip up in Bancroft, Ontario. The location was a friends family farm. While walking around I saw an interesting barn wall with nice color and texture. I snapped a photo, later on I realized that among the carving on the wall was two initials of a friend and his GF. They are now engaged so I thought the image would make a nice gift. In the process I learned a bunch about editing for print.

I didn't record any real detailed information on what I did, but will do my best.

The original image was good, but lacked any real pop, also there was some distracting carving dead center in the image that drew the eye to the wrong place. It was gonna take a bit of effort to pull it off.

Farm_041809_229 copy

I decided to go for subtle changes as I wanted to keep things familiar and real. I started by upsizing the file to almost twice the size using Bilinear Interpolation. I didn't use bicubic as I wanted to keep the texture. Once I enlarged it, I edited the crosshair carving in the middle, just a bit of cloning to tone it down - the goal was to make it less prominent without actually removing it. The wall is familiar to many who will look at the print and if I removed it - it would be missed. Incidentally the crosshair carving was done by the father of CJ. I played with the levels a bit to bring the contrast up and make the texture pop. Again, I didn't want to go too far here. A bit of use of the clone tool was also used on the initials to make the C look less like an E.

Next came the keystoning. The goal here was to make all the boards straight and correct for the fact I was shooting up in my composition. A bit of free transform and I had that done.

Next came the crop. I used the 3 board ends that can be seen at the top to determine my horizontal crop. I maintained the right edge as it was, I wanted to move the initials as close to the third as possible as it is the ultimate subject. The final print was going to be 10x13 so my vertical crop took into account the necessary aspect ratio.

Next I resize the image to 10x13 at 240dpi, this was the right resolution based on input from my printer.

Final step... Sharpen. A bit of sharpening is applied at the end of the process. And finally... The image.

Farm_Final2

A quick trip off to the printer with my PSD file and I am really happy with the final print. It is all framed and ready for gift-wrapping.

The only mistake I made. In the future I will size the image about 1/8th of an inch larger. The printer ended up cropping a tiny little bit of the image. Not sure where that happened, but I will find out why for future efforts.

Thanks to BJ Photo in Waterloo for the quality print. BJPhoto.net